Numerical simulations blog by Slawomir Polanski
A word about skateboarding
 Written on
July
15th,
2017
by Slawomir Polanski
In my life I had so many hobbies that it would be hard to count them. Skateboarding was definitely the one which I remember the most and it is still my favourite sport. It has fascinated me so much that I wrote my Bachelors Thesis about it. In this thesis, I did a computer simulation of a skater landing on a skateboard. That was especially interesting for me as I could have done an experiment on a skateboard without physically destroying it.
The dissertation was split into the three stages and the complexity of the model was increasing throughout them. In this blog, I will try to describe the process of model creation without getting into details. By details, I mean not providing any complicated equations, terms and all bunch of things which may scare a person who has no knowledge of simulations.
For the purpose of this article, I used Abaqus Student version which is available free of charge to students, educators, and researchers for personal and educational use. I believe the educational blog fits well to these requirements.
Simple specimen experiment
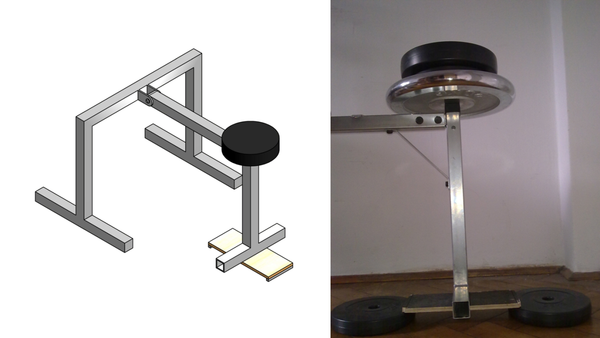
Analysis of a skateboard is not an easy task due to its’ complicated geometry and unusual material used to built the deck. Traditionally, manufacturers are using a composite material made from Canadian Maple layers, usually 7-9 plies. I decided to build a simple plate model on computer to understand this composite behaviour. Luckily, at home I found an old skateboard from which I cut an analogue real sample. After that, I utilised it in a bending test performed in the professional laboratory built from a home gym set :-) .
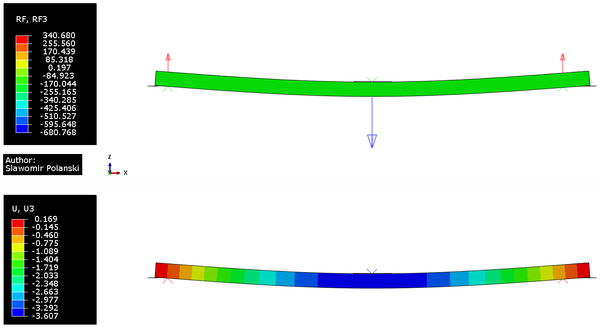
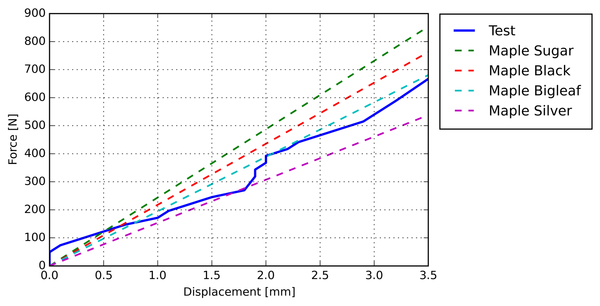
The main idea of the physical tests was to find a relation between deck deflection and a value of mass used to weight the deck. In more engineering terms, I was trying to look for a displacement under given loading. The measurements were performed by a ruler, so the obtained data were probably far from being accurate. However, the rough results were enough to judge if my numerical model could be acceptable. Before I moved to model creation process, I had to find material properties which are crucial in Finite Element Analysis. At that stage, I found a very useful Wood Handbook which presents Canadian Maple material data (it can be found here). Using the data from this resource, I built a shell geometry in Abaqus and applied the lamina material model to it. After that, I put appropriate restrains and loads to imitate the body behaviour from physical tests. The results from experiments are presented below.
The colourful plots do not show any non-physical behaviour which is a good sign. Also, looking at the force-displacement graph it can be seen that the numerical model results are not far from physical tests. It indicates that both lamina material model and the material properties can be assumed as correct for further investigations. At this point, it is worth showing how easy is to get results for different material data. In case of physical tests, I would have to cut few different samples to use them in experiment. For the numerical simulation, it is only matter of changing few variables.
Skateboard pressure test
Another stage was to perform skateboard pressure test simulation. It allowed to check the strength of the deck under the static loading. That is also a stage when the real shape of skateboard was created. I remember, that it took me a while till I figured out how to model the geometry properly. Luckily, in this blog I used a 3D scan done by Neomek from GrabCAD and I am very grateful for his job.
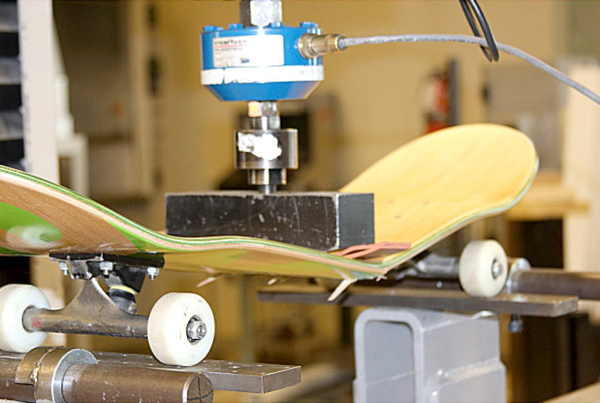
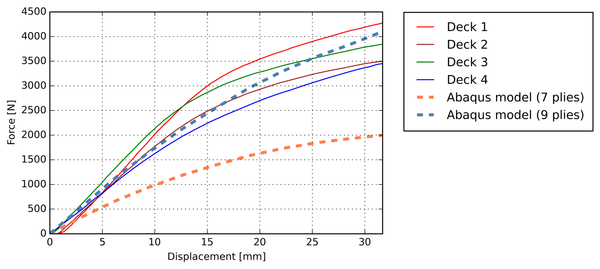
When writing the thesis, I found some data from physical experiments which seem not to be available any more. Fortunately, I saved a laboratory test photo and the original results (here). The author performed strength tests of four decks, however he didn’t state what kind of skateboards he had used. As a result of that, I had to assume that my composite structure is the same as his.
Despite few assumptions made at the beginning of the simulation, it can be seen that results from the real and the numerical tests are pretty close for deck with 9 plies. It also shows how valuable from engineering point of view the composites can be. Small change in the deck structure has huge impact on the strength property, while it has almost no impact on its’ weight.
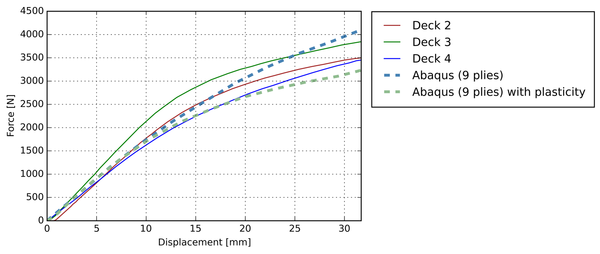
I went even further and checked what happens if I use an elastic-plastic material properties. In other words, I tried to use material model which should give more accurate results, but it is more difficult for a software to perform the simulation. As presented below, the new material model fits better to the real test.
Drop-test simulation
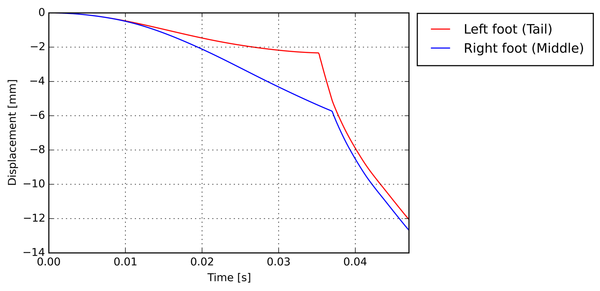
In the final stage, the human geometry was added to the model, so I could model the deck behaviour under dynamic loading. I assumed that skater (70 kg) jumps from the height of 1 meter and lands on the skateboard in the most destructive way. The animation below presents where the skateboard is going to break.
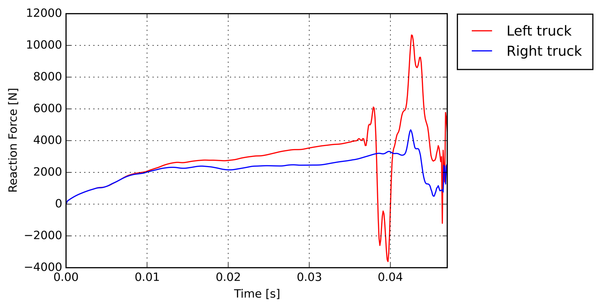
For this particular loading case, I don’t have any experimental data to check whether the numerical model is correct. However, I can compare the obtained reaction forces with values from the static pressure test. From the static simulation, I know that the deck should break under the loading of 3000-4000 N. Looking at the plot below, one can say that this is happening here. Just after 4000 N the Reaction Force value starts fluctuating. This is the moment when skateboard starts breaking.
Conclusions
I tried to be precise in this first post, but I wasn’t able to make it shorter than that. When reading it I feel like I am still hiding some information from the reader. I think it might be better for non-engineers to be introduced gently though. That is why, if you feel you want to know more put a comment or just contact with me!
